
FRAMES ON CARD by ANU THAKUR

Hey there crafty people !
This is Crafter Anu, Creative Designer at Tubby Craft.
Today I have 2 fun cards to share with you all.

To create these cards I have used Tubby Craft
TAG PATTERN STAMP SET


Now without any further ado let's jump in to the tutorial.

CARD 1 - GIFT FOR YOU


Follow the instructions to create:

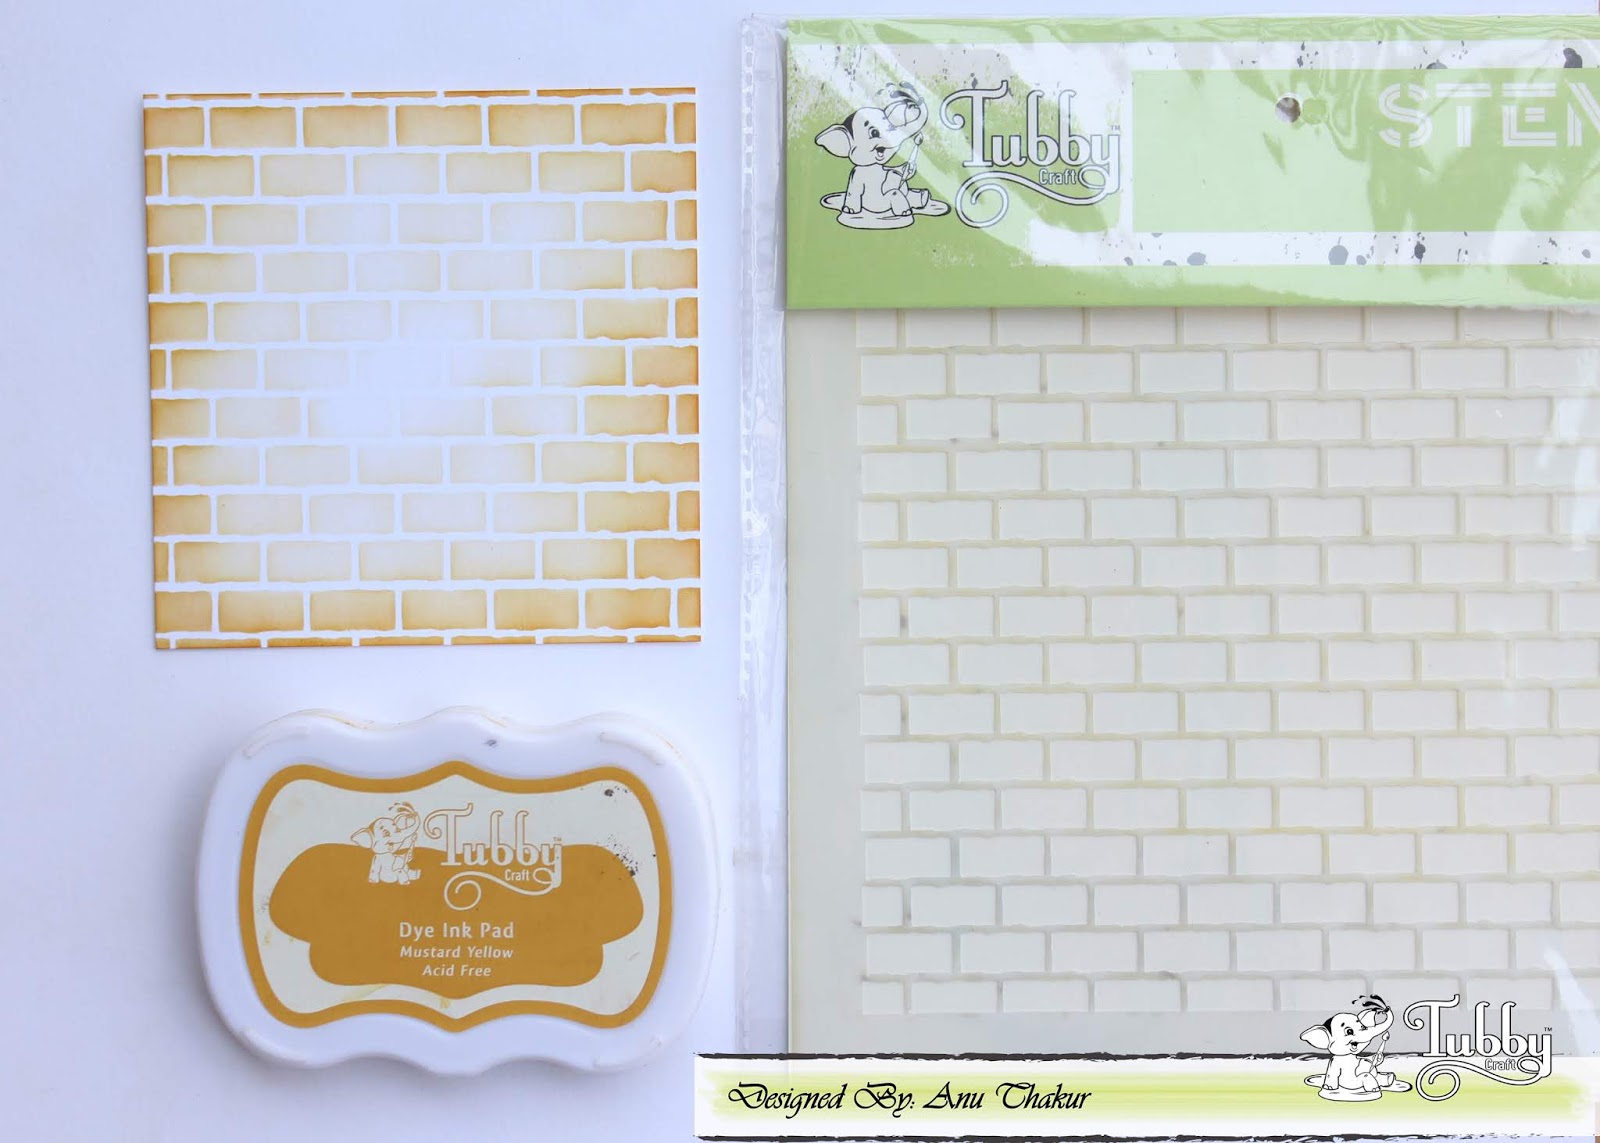
Step 1: Take a piece of white cardstock measuring 4x4 inches
& do stenciling on the same using Tubby Craft bricks stencil.
I have used Tubby Craft MUSTARD YELLOW dye ink here.


Step 2: Take the wood frame stamp & stamp it using versa-mark ink
& heat emboss it with white embossing powder.
Color it brown & then cut it out.
I also adhere a piece of vellum sheet on the back of both frames.


Step 3: Print out a gift & cake image (use stamps if you have the correct size)
Color & cut them out.


Step 4: For the sentiments I did the same thing stamp with versa-mark
& heat emboss it with white embossing powder.
Then cut it out.

Step 5: Now first adhere the gift & cake images on each frames &
then add the frames on card base using foam tape.
Now add the sentiments with foam tape as well.
Finally to finish off add the card base to a note card.


-----

CARD 2 : LOVE FRAMES


Follow the instructions to create:

Step 1: Take a piece of white cardstock measuring 4.5x4.5 inches
& do stenciling on the same using Tubby Craft bricks stencil.
I have used Tubby Craft LEAD GREY dye ink here.


Step 2: Take the elegant round frame stamp & stamp it using versa-mark ink
& heat emboss it with gold embossing powder.
Color it with bright colors & then cut it out.


Step 3: Print out sentiments of your choice (make sure the size fits perfect in frame)
I did it taking a circle reference of 3 cm diameter.
I also print a sentiment of vellum sheet.


Step 4: Now first adhere sentiments on each frames &
then add the frames on card base using foam tape.
Now add the long sentiment strip wrapping the frames.
Finally to finish off add the card base to a note card.


-------

So this is all from me today.
I hope you enjoyed these projects & the tutorial.
Do like, comment & share :)
Until next time, Happy Crafting.

xoxo
Crafter Anu


Comments

Popular posts from this blog

ATC coins using mini stamps

Hello there, This is Priyadarshini here today, I have ATC coins here today using stamps from Tubby craft. I have used 3 different stamps to make these. They are easy and quick to make and absolute fun too. I have a common base here which is black cardstock and die cut small circle from white cardstock. I created different background for each using stencils and inks from Tubby craft.  What are Artist trading coins? They are miniature art created on 2.5"circle of heavy base cardstock.  ATC with stenciled background                      First, I stenciled the white cardstock using stencils and dye inks. Then added this to a black circle die cut.  Inks used are:  Turquoise ,  Olive green ,  Lavender violet I offset the stencil to get a a complete stenciled background. I stamped the images from  Lovely Owl  and  Butterfly Love  and coloured them with colour pencils.  To embellish, I added corrugated sheet,cotton gauze and twine.  To finish the coins, I added

Tubby Craft - Penguin Love - Birthday Cards by Deepti

Hello Everyone, I'm stopping by to share two birthday cards using cute Tubby Craft stamp called "Penguin Love" and "Birthday Wishes". I have used Masking technique to make both the cards. Card 1 To make this card, I die cut out the white card stock and stamped the penguins by masking them using Black tubby craft ink. Once satisfied, I stamped the balloons too and colored all these images using alcohol markers. After that I stamped the sentiment on white strip and adhered the same using foam tape along with washi tape. Glued it on Pista green card stock. Finally added some clear sequins to complete it. Here is my second card using same stamp set.. For this card also, I die cut out white card stock . Then I stamped the image and masked it to ink the background. After that I stamped the balloons and the sentiment. Added stamped and fussy cut gift too.  Finally adhered it on matching note card and added some matching s

Two amazing anniversary cards by Anushree

Hi Everyone !! Hope you all are doing good and crafting too. I have two cards for today. I have highlighted  different techniques for each card. Onto my first card, I have tried showcasing repeated stamping in a border style . I have used Plumeria Florals stamp set and Jet Black dye ink from Tubby craft to stamp the border first. Next I chose Imperial Red and Lead gray dye inks from Tubby Craft to color my florals. Sentiment is a die cut on Gold card stock and the card is embellished in gold peals. For border,I have adhered Gold border die cut to enhance the card on a black cardstock. Now onto my second card, I am using Checkered Stencil for the background .I have used rainbow colors from Tubby Craft Dye ink collection to put them on paper using blending brushes. I masked the center with a circle die cut before applying inks to the card base. Once stenciled background is ready,I removed the mask and stamped sentiment from Luc