
Meet New Design Team Member - Hiral | Peek-a-boo and floral card


Meet Tubby Craft New Design Team Member - HIRAL VAIDYA


She is Hiral Vaidya and is from Toronto, Canada. She is a avid crafter and a passionate card maker & a scrapbooker. She loves to create beautiful crafts with papers, inks, stamps, dies, embellishments, everything and anything related to handmade. Her true passion lies in designing interactive and innovative cards and mini albums. Her style is shabby chic but always willing to learn new styles and techniques and share them on my social media. Her mission is to spread my passion by sharing with others the power of Love and Kindness of the handmade greetings.

Over to Hiral -

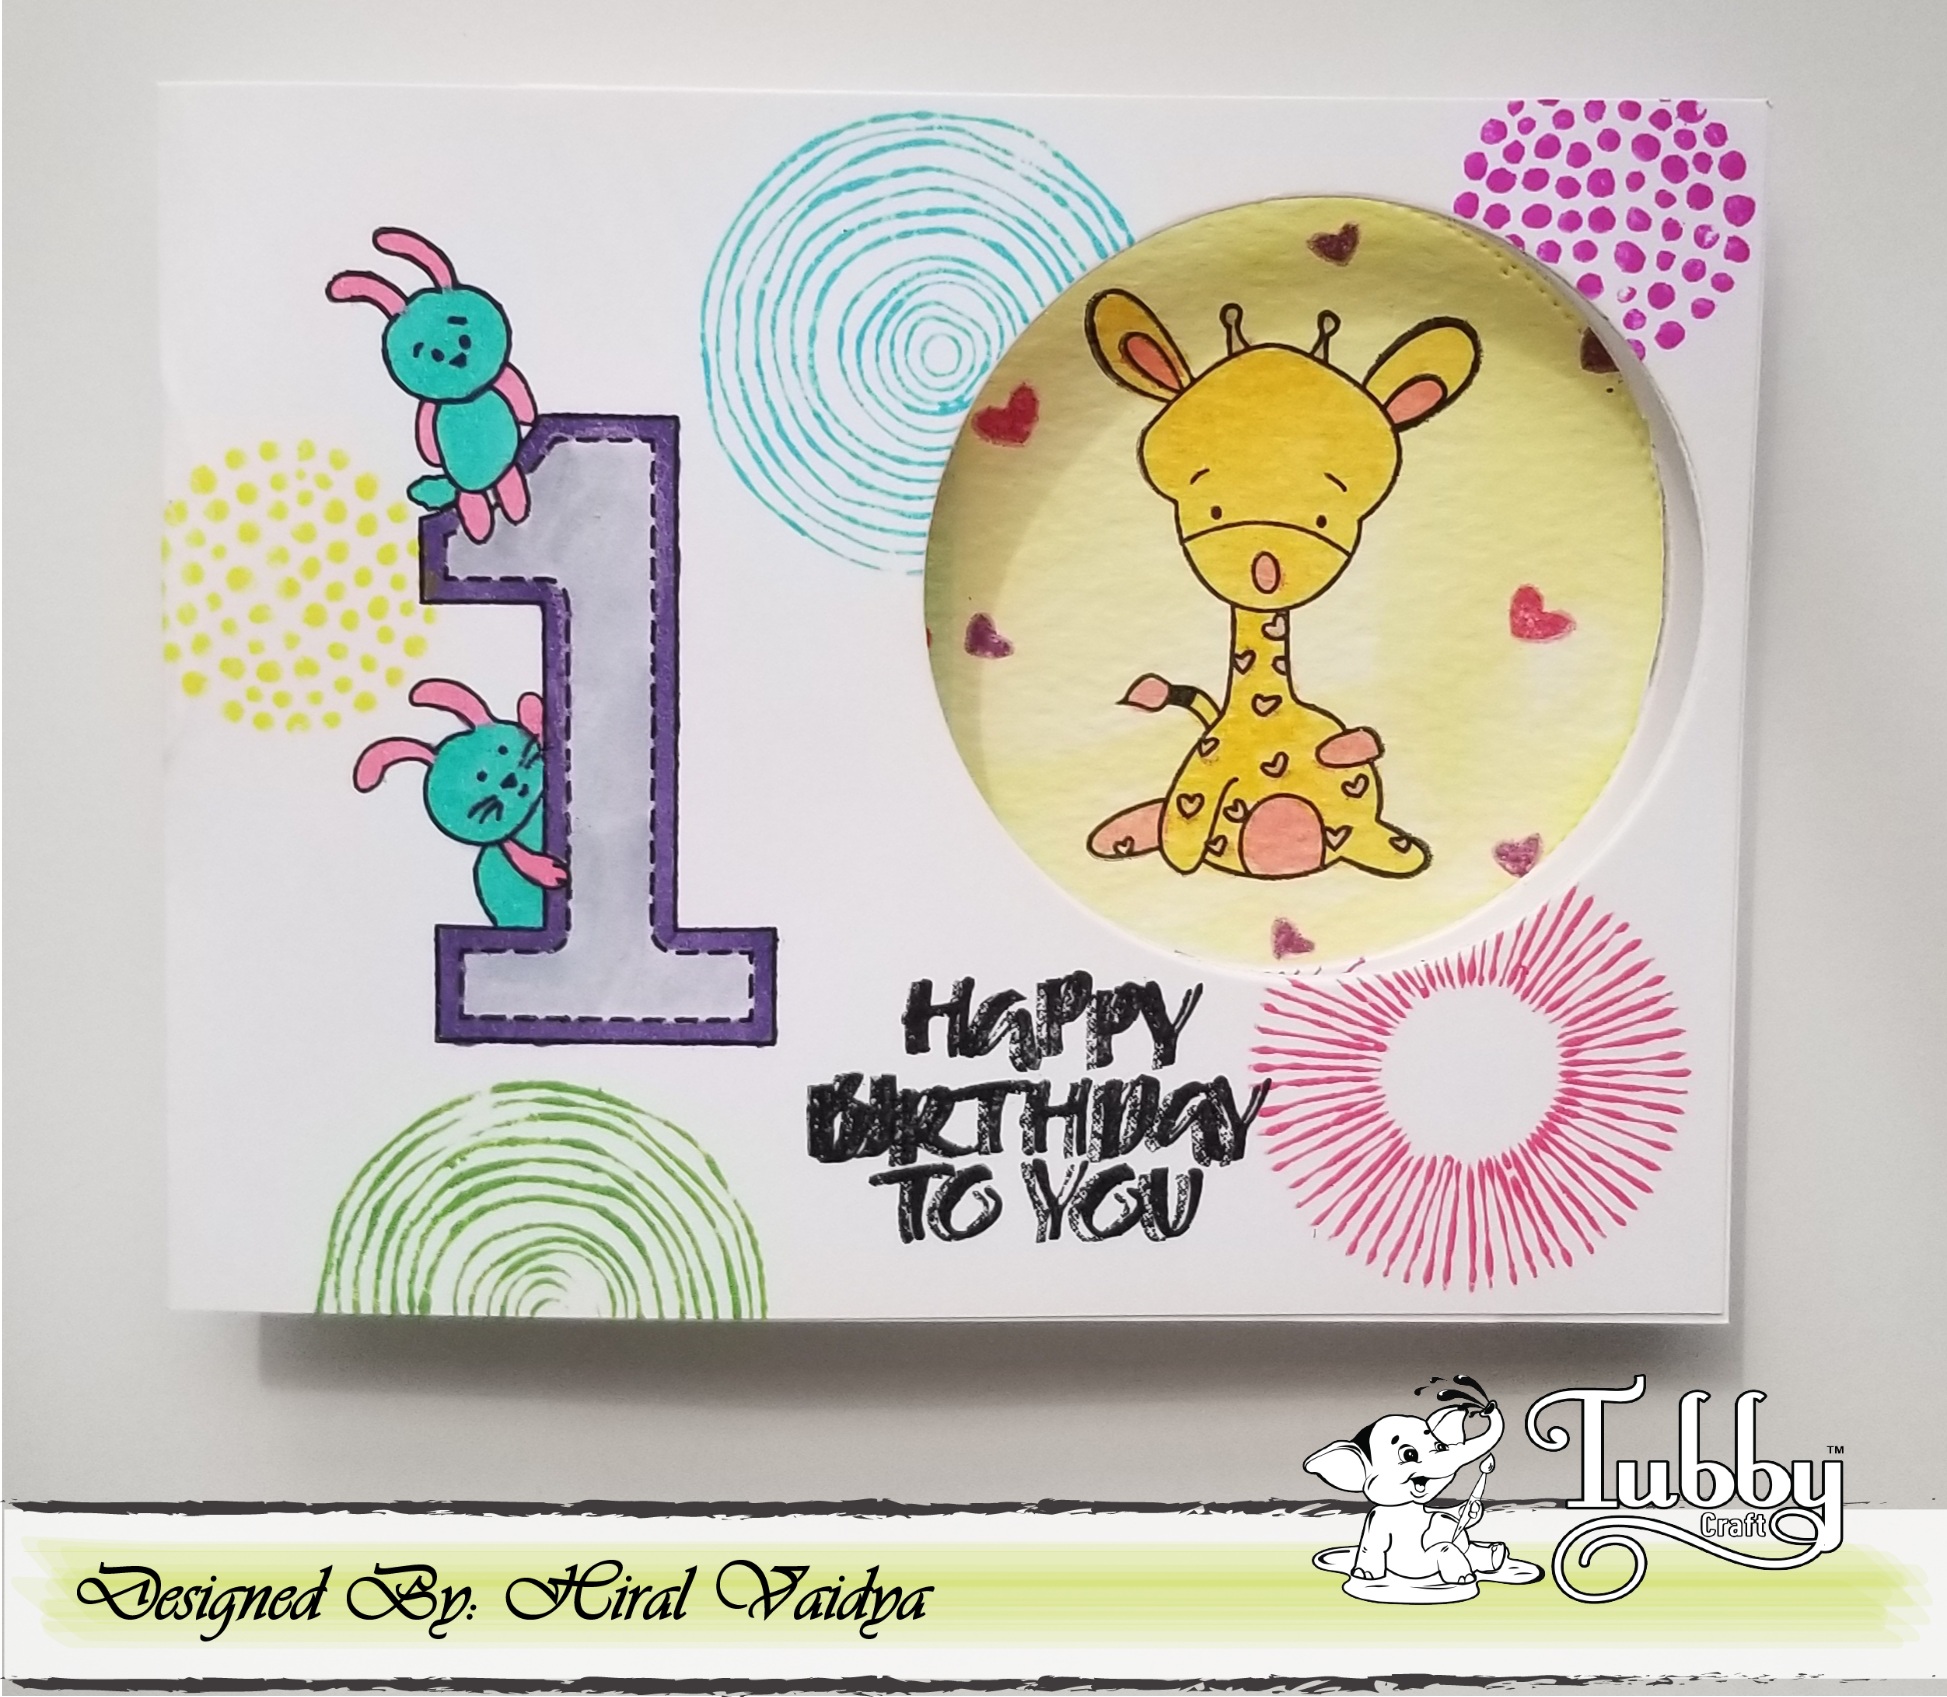
Today is a very special day as I am starting my 1st blog sharing this adorable Peek-a-boo baby card featuring Tubby Craft Stamps and inks. This is my first blog post as a design team member for Tubby Craft and I am excited to share this picture tutorial with you all. 

I wanted to mention their inks blend very well and very easy to clean the stamps. 


Peek-a-boo Card


I was totally inspired by Jennifer McGuire and created this cute baby card. 
I started with 3 card panels (Front - 4 1/4 x 8 1/4 , Inside - 4 1/4 x 8 1/2 , Back - 4 1/4 x 5 3/4). Score at Front - 2 3/4 , Inside - 4 1/4 , Back - 5 1/2.


Die cut circle from Front panel as well as inside panel.


I stamp "One is Fun" stamp and than water coloured it with amazing Tubby craft inks on the front panel.


I used Imperial Red, Mustard Yellow, Lemon Yellow, Olive Green, Lawn Green, Lilac Purple, Lavender Violet, Turquoise inks for my card. I also stamped a Giraffe image from "Giraffe love" stamp set and cute little Unicorn from "Unicorn Dreams". I stamped "HappyBirthday" quote twice with bit of imperfection to make it look as a baby card.


For the unicorn, I watercolored the background with rainbow colours and stamped Cute unicorn with Hero Hues Black Dye Ink. I loved the rainbow background so much that I did not over colour the Unicorn again. 
And it turned out suppeeeer cuuttteeeee.....


This is my first ever picture tutorial and hope I was able to inspire everyone. 


Please find all the craft supplies used for this card below:

 Giraffe Love

 One is Fun

 Unicorn Dreams

 Lemon Yellow
 Imperial Red
 Mustard Yellow
 Lawn Green
 Chinese Blue
 Lead Grey
 Chocolate Brown
 Light Pink
 Magenta
 Hot Pink
 Aqua Blue


FLORAL CARD

Coming up with my 2nd card that I created using Tubby Craft Camelia Layered Flower Stamp set.


This stamp set consist of 3 step Bloom flower as well as small flowers and leaves and springs. Very easy to use and stamps a very crisp image with any dye inks.


I used Lemon Yellow, Mustard Yellow, Imperial Red for the Bloom flower. Lawn Green and Olive Green for leaves and springs. Magenta, Aqua Blue and Chinese Blue for small flowers. 

Used Bristol smooth watercolour paper and stamped these set-by-step instructed on the set.

The sentiment " Don't forget to be awesome" also comes in the stamp set. I am very pleased with the result and hope all you like it.


Please find products used for this card below :

 Camelia Layered Flower


Please do follow and comment if you like my creations. Happy Crafting !!! :)


Comments

Popular posts from this blog

ATC coins using mini stamps

Hello there, This is Priyadarshini here today, I have ATC coins here today using stamps from Tubby craft. I have used 3 different stamps to make these. They are easy and quick to make and absolute fun too. I have a common base here which is black cardstock and die cut small circle from white cardstock. I created different background for each using stencils and inks from Tubby craft.  What are Artist trading coins? They are miniature art created on 2.5"circle of heavy base cardstock.  ATC with stenciled background                      First, I stenciled the white cardstock using stencils and dye inks. Then added this to a black circle die cut.  Inks used are:  Turquoise ,  Olive green ,  Lavender violet I offset the stencil to get a a complete stenciled background. I stamped the images from  Lovely Owl  and  Butterfly Love  and coloured them with colour pencils.  To embellish, I added corrugated sheet,cotton gauze and twine.  To finish the coins, I added

Tubby Craft - Penguin Love - Birthday Cards by Deepti

Hello Everyone, I'm stopping by to share two birthday cards using cute Tubby Craft stamp called "Penguin Love" and "Birthday Wishes". I have used Masking technique to make both the cards. Card 1 To make this card, I die cut out the white card stock and stamped the penguins by masking them using Black tubby craft ink. Once satisfied, I stamped the balloons too and colored all these images using alcohol markers. After that I stamped the sentiment on white strip and adhered the same using foam tape along with washi tape. Glued it on Pista green card stock. Finally added some clear sequins to complete it. Here is my second card using same stamp set.. For this card also, I die cut out white card stock . Then I stamped the image and masked it to ink the background. After that I stamped the balloons and the sentiment. Added stamped and fussy cut gift too.  Finally adhered it on matching note card and added some matching s

Two amazing anniversary cards by Anushree

Hi Everyone !! Hope you all are doing good and crafting too. I have two cards for today. I have highlighted  different techniques for each card. Onto my first card, I have tried showcasing repeated stamping in a border style . I have used Plumeria Florals stamp set and Jet Black dye ink from Tubby craft to stamp the border first. Next I chose Imperial Red and Lead gray dye inks from Tubby Craft to color my florals. Sentiment is a die cut on Gold card stock and the card is embellished in gold peals. For border,I have adhered Gold border die cut to enhance the card on a black cardstock. Now onto my second card, I am using Checkered Stencil for the background .I have used rainbow colors from Tubby Craft Dye ink collection to put them on paper using blending brushes. I masked the center with a circle die cut before applying inks to the card base. Once stenciled background is ready,I removed the mask and stamped sentiment from Luc