Tubby Craft Design Team Member - Archisha Mukherjee

She is Archisha Mukherjee and from Pune. She is a a paper crafter who creates cards, tags, bookmarks, photo albums, explosion boxes and scrapbooks. She is an IT engineer by profession and crafter by night and sometimes vice versa. Her name is Kenchi School (YES!! Kenchi as in scissors) which was established 2.5 years ago.
She discovered her super powers to create handmade happiness at very young age and finally recognised her dreams by buying a carton full of crafty things (This was almost 6 years ago). Now she have a semi craft room with loaded goodies. Sometimes she conduct Craft camps for children and love the look on their face when they understand how a die cutting machine works and when the embossing powder melts. In free time, she also enjoy dancing and making short movies.
You can follow her at
Instagram - https://www.instagram.com/kenchi.school/
Facebook - https://www.facebook.com/kenchi.school/
Youtube - https://www.youtube.com/channel/UCKi8JzS3l81zJi3eMe_0Wxw
Blog - https://kenchischool.wordpress.com/
Facebook - https://www.facebook.com/kenchi.school/
Youtube - https://www.youtube.com/channel/UCKi8JzS3l81zJi3eMe_0Wxw
Blog - https://kenchischool.wordpress.com/
Over to Archisha -
Hello Fellow Crafters !!!
My name is Archisha Mukherjee from Kenchi School and I am thrilled to be a part of the Tubby Craft Design Team.
Today I would like to showcase two types of box cards that I created using Tubby Craft supplies.
Refer the end of the post to know what are the supplies used for this card.
CARD 1 - Baby boy Pop-Up Box Card

I used the Tubby Craft Boy And Girl Clear Stamp Set to create this card.
For the pop up box mechanism, I used a generic pop-up box die set but you can refer the image below to cut these using scissors as it is a super easy template.
(a) Big Die cut piece (left) - Quantity 2 (b) Small Die cut piece (right) - Quantity 3

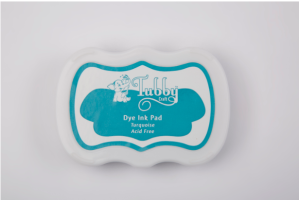
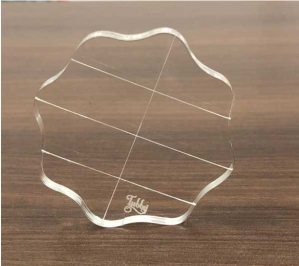
I stamped some white card stock using the polka dot clear stamp from the Tubby Craft Boy And Girl stamp set using the Tubby Craft Aqua Blue Ink and Tubby Craft Acrylic Block - Jumbo.

I die cut from this stamped card stock to make the decorative covers for my pop-up box flaps.
Below are the measurements of these die-cuts.

I stamped all the images required, with Tubby Craft Jet Black Ink using the Tubby Craft Acrylic Block - Medium and coloured my images using alcohol markers. The rattles and teddy faces were stamped using the Tubby Craft Olive Green Ink. I also fuzzy cut the images out with a thin white border around the images.

I assembled the pop up box with the elements created above.
Below is the image when our pop-up box is closed (and flat enough that it can be sent through mail)

When the receiver opens the card, all the elements pop out to form a 3D scene.

I decorated the flaps of the pop up box with pearl embellishments along with yellow stitched border and button die-cuts.

I used acetate strips to suspend the rattles, teddy bear heads and the floral banner at the top.

I stamped both the sentiments (which are from the same stamp set) using white heat embossing powder on navy blue card stock.

And the perfect card for a new member in the family is complete !
CARD 2 – Unicorn Shadow Box Card

For card two, I used the Tubby Craft Unicorn Designs Clear Stamp Set to create a shadow box card.
I first created a night sky by perfectly foam blending Tubby Craft dye inks in the colour - Jet Black, Lavender Violet, Sapphire Blue, Chinese Blue and Turquoise. I added some stars using my white gel pen.


For the shadow box mechanism, I cut out 2 white card stock of pieces of 6 inches by 5.75 inches.


I cut out a frame out of one of the pieces for the front of my card. I scored both the pieces at half an inch and 1 inch from both ends. (refer the image above for more details.
I stamped the unicorn from the stamp set using Tubby Craft Jet Black Dye Ink and coloured them using alcohol markers. I also cut two strips of paper of 1 cm by 13 cm to create another layer in between. I also die cut some clouds from vellum paper to create layers in my shadow box card.


I attached the inked night sky with glue to the back piece of the shadow box card (the one without the cut out frame). I cut out my die cut clouds into smaller clouds and created the first layer of clouds.


Then I stuck the 2 thin strips to create the second layer in between.


And added more vellum clouds on it to make the clouds more dense. I also added my unicorn on a strip of acetate to make it appear like it is floating in mid air.


Finally added the top layer of my shadow box and added even more vellum clouds.


I made a speech bubble for my sentiment 'Miss You' and stamped it using Tubby Craft Acrylic Block - Small and Tubby Craft Jet Black Dye Ink.

Finally I added some holographic sequins and choral card stock strips around the frame to complete the scene.


This card is in memory of my dad cause I miss him so much ♥
Tubby Craft Supplies used -


Tubby Craft products are available at following online retailers -
That's all from my end for today. Have a crafty weekend !
Archisha Mukherjee
Comments
Post a Comment