Hey Crafty People!
It's Tasha here, and I am back with some more inspiration, using what have quickly become my absolute FAVOURITE Tubby Craft stamp sets!!!

I'm using the beautiful Layered Roses set, along with the Script stamp; which is oh so versatile and just perfection! I've wanted a scripty words stamp for so long, but I haven't seen one which was quite what I was looking for, until now that is.
Card 1 - Faux Watercolour & Offset Stamping

I repeated the same technique using the two leaf images' solid layers using Emerald and Olive Green, spreading the leaves out around my flowers.

You will need to leave this all to dry before moving onto the next step.
I decided to skip the detail shadow layer and went straight to the outline. I used the same round acrylic block to stamp the outlines in Jet Black Dye Ink, but I purposely offset the outline to add for that loose, watercolour feel.

I trimmed the panel by around 1/8th inch each side and die cut a sentiment strip from the essentials strip set by Altenew and I glued it straight down onto my card panel.
After I had it in place I decided to add a border, so I just used a ruler and black fine liner to go right the way round and stuck it straight onto an a2 card base.
I love it!
Card 2 - Scripty Hello

Once I let the ink settle a little, I added the second layer, but I used Imperial Red Dye Ink again; this gives you a really soft shadow and I love how it turned out.

One of the things I love about the Script stamp is that it can easily be repeatedly stamped to create one full larger image; there are no words that need to line up perfectly.
I put it onto the Rectangular Acrylic Block and stamped it repeatedly with Jet Black Dye Ink onto a piece of the Iris paper by Dress My Craft that comes inside the DIY Papercrafting Kit - Birthday
I just love the slight texture this paper has and stamping onto it is an absolute dream!!! It took the ink beautifully, with no bleeding at all.
I attached that to a strip of black cardstock and put the whole thing onto an a2 card base made from 110lb Neenah.

I fussy cut the rose and die cut my sentiment before adding them both onto the card, allowing the sentiment to sit around the rose for a fun look.
Card 3 - Slimline Hugs

I stamped out the Layered Rose, this time I went for a purple flower, using Magenta and Lilac Purple and I mixed it up a little by using second generation stamping for one of them.

I let my circle sit off the edge of the panel, then I flipped it over to trim any excess off.

I absolutely LOVE how these turned out, and even though I just made these three, I can't wait to use these gorgeous sets again!
Thanks so much for joining me for this crafty post, I hope you have a lovely, happy, safe, wonderful week.
Stay Crafty!
Byeee!
HandmadeByTasha
Instagram | Youtube | Blog | Facebook
Supplies
 |
| Imperial Red Dye Ink |
 |
| Jet Black Dye Ink |
 |
| Magenta |
 |
| Emerald |
 |
| Raspberry |
 |
| Olive Green |
 |
| Hot Pink |
 |
| Lilac Purple |
 |
| Light Pink |
 |
| DIY Papercrafting Kit - Birthday |
 |
| Layered Roses |
 |
| Script |
 |
| Envelope Quotes |
 |
| Small Acrylic Block |
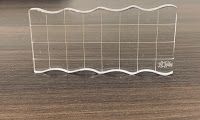 |
| Rectangular Acrylic Block |
I'm curious to find out what blog platform you're using? I'm experiencing some minor security issues with my latest website and I would like to find something more safeguarded. Do you have any recommendations? a5 frame
ReplyDelete