Hello Crafters,
This is Archisha again from Kenchi School.
Today's pictorial is about 2 kinds of backgrounds -
Using Patterned Paper Built Up
Using Stamps and Inks
Before we start, let me inform you that if you like my cards, you can find my on YouTube, Instagram and Facebook as well.
BABY CARD WITH PATTERNED PAPER BACKGROUND -
So do you also have those pretty patterned paper packs sitting on your rack but you feel to overwhelmed to use it? Well, I do and hence I looked up for a color board to pair up my patterned paper to make a pretty combination for a baby girl card.
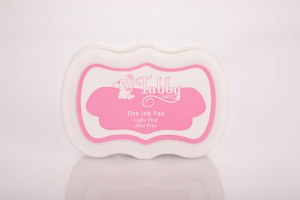
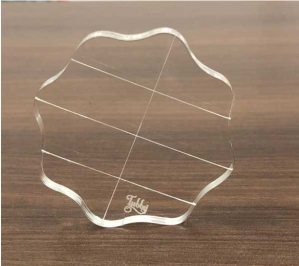
I stamped the baby girl image using Tubby Craft Jet Black Dye Ink using the Tubby Craft Medium Acrylic Block and the sentiment 'Showers of Happiness' using Tubby Craft Lilac Purple Dye Ink and Tubby Craft 2x4 inches Acrylic Block from the Tubby Craft Boy and Girl Clear Stamp Set.

I coloured the stamped image using alcohol markers and highlighted the word 'Happiness' with a black thin marker.
I fish tailed the strip on which the sentiment was stamped.

I also stamped the big bold bow from Tubby Craft DIY Background clear stamp using Tubby Craft Light Pink Dye Ink and Tubby Craft Small Acrylic Block.

The other elements were -
- Pink Tulle 1 inch ribbon.
- 1/8th inch Navy Blue ribbon.
- Stitched edges hexagon diecuts in size '3 1/8th x 3 5/8th' inches in colour pastel green with white polka dots and '2.5 x 3' inches from white card stock.

- Navy Blue card stock size '5 x 4 1/4th' inches.
- Scalloped edge green, white and pink stripe paper size '4 3/4th x 3' inches.
- Pink and White polka dot paper size '4 5/8th x 3 1/8th' inches.
The assembly of this card is super easy. I have mentioned it below in simple steps.
STEP 1:
The navy card stock formed the base of the card panel. On this, I layered the scalloped edge paper using liquid glue.

STEP 2:
I added the pink tulle ribbon with the navy skinny ribbon as a belly band on the pink polka dotted patterned paper. Then stuck this setup using foam tape on the layer from STEP 1.

STEP 3:
Next, I stuck the green and white polka dotted hexagon paper using more foam tape and I added the white hexagon paper with some liquid glue.

STEP 4:
I added the stamped image, sentiment and bold pink bow in the center of the white hexagon piece.

STEP 5:
I added some white buttons on the corners for added accent.

STEP 6 :
Lastly, added some glossy accents on my elements for details.

And that completes the super easy steps to complete the first card.

BIRTHDAY CARD WITH STAMPED IMAGE BACKGROUND -
Sometimes we love certain elements of a stamp set so much that we do not use the rest. This card is apt for those stamps which may confuse you to place properly.
In the beautiful Tubby Craft Unicorn Dreams Stamp set, I had already made a card using the unicorn but i wanted to incorporate the little rainbow in my card as the star.
So i created a continuous background with it :)

For this apart from my stamp, I used Tubby Craft Small Acrylic Block, Tubby Craft Light Pink Dye Ink and a '4 x 5' inches white card stock as my surface to stamp on.

I stamped the small image, randomly on the entire white base in random directions.
Since, I had a relatively lighter colour as my background, I wanted to create a BOLD sentiment without over powering the my beautiful background.

For this I diecut some back card stock from Simon Says Stamp HAPPY BIRTHDAY Wafer Die using my die cutting machine. The pink and black created a perfect contrast for my card.

I also wanted to add the sentiment 'You are my Rainbow' from the same stamp set which was stamped on a thin strip of same white card stock as the background.
I used the Tubby Craft Jet Black Ink and 2 by 4 inch Tubby Craft Acrylic Block to create this sentiment.

I also diecut a square stitched piece of vellum to layer behind my sentiments. Layering some vellum helps a sentiment to stand out in a busy background but does not cover up that wonderful background as well.

I layered the Happy Birthday diecut with liquid glue and the rainbow sentiment with foam tape.
Then i added a tape runner to this sentiment layout to stick on my rainbow-y background. The tape runner does not show up from behind the vellum (like liquid glue does)

I matted this ensemble on a nude coloured card stock of size '4 x 5 1/4th' size to create a very clean and simple layered look.

Finally, i added the card panel on a white A2 size notecard (4 1/4th x 5 1/2 th size). I coloured the edges of my note card with my C7 alcohol marker to make a dark border. Finally a few holographic sequins were added to complete the look.

And that completes our second easy card for today.
I hope you guys had fun today learning these techniques and I will be back again. Bye !
Tubby Craft Supplies used -


Tubby Craft products are available at following online retailers -
Nagashri Arts
Comments
Post a Comment