
Watercoloring and embossing trap technique with Bharati

Hello There! 

Welcome to my post. Today, I have made 2 projects using tubby craft stamps with two different techniques for card making.

PROJECT 1 : Water coloring with dye inks and background with Alcohol inks

1.JPG

To make this card I first Stamped the image of this beautiful oyster with a pearl from the stampset called "Precious Treasure" using the acrylic blocks by Tubby Craft and Tubby Craft Jet Black Ink and heat embossed it with in clear embossing powder.

2.JPG

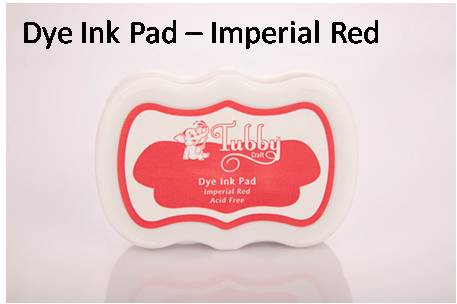
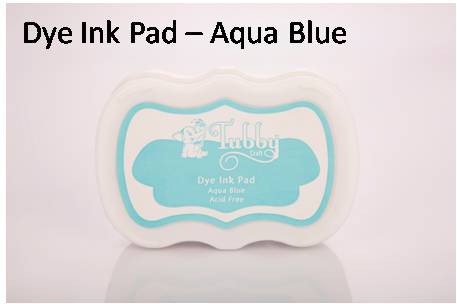
I then colored the image using Tubby Craft Dye inks as water colors. The inks i used are : Imperial Red, Tangy Orange, Lemon Yellow, Light Pink, and Aqua blue. I added a few white highlights and fussy cut the image.

2a.JPG

Then on a separate card front I stamped the sentiment from the same stamp set called "Precious Treasures" using the acrylic blocks by Tubby Craft in Tubby Craft Jet Black Ink. I then added a strip of background with alcohol inks and even slimmer strip of black and white patter paper along the edge of the card front.

3.JPG

I then adhered the fussy cut image of the oyster using multiple layers of foam tape for added dimension. I then matted the card front with black card stock and adhered it to a white card base.

5.JPG

Tubby Craft Supplies Used: 

Tubby Craft’s acrylic block with guidelines – for comfort stamping and excellent gripping

big acrylic block small 

precious treasure.png 

INKS 

ink Lemon-Yellow ink Imperial-Redink Light-Pink ink Tangy-Orange ink Jet-Black ink Aqua Blue

CARD 2 : Dye inks and embossing trap technique

1.JPG

For this card, I used the image from the stamp set called "Floral Elements:" and using the acrylic blocks by Tubby Craft I stamped the flowers and leaves in Tubby craft inks on a white card stock.

2 3.JPG


4.JPG

After the inks were dry i stamped all the images with Versamark ink and heat embossed the areas with clear embossing powder. Once I was sure all the colored images were sealed with the embossing powder, I covered the entire card front with Tubby Craft Jet Black Ink.

5a.JPG

I then cut the entire panel into rectangular pieces and adhered them with multiple layers of foam tape on a card front. This way the patter gets a unique layout and has more dimension. I tucked in a black and white pattern paper on the edge and added a word die cut on the top for sentiment.

6.JPG 

Tubby Craft Supplies Used: 


Tubby Craft’s acrylic block with guidelines – for comfort stamping and excellent gripping
big acrylic block small


Floral Elements.jpg 


ink Lawn Green ink Lemon-Yellow ink Tangy-Orangeink Imperial-Red

I hope you liked my cards. Do let me know how you like these cards by leaving me comments. I love to read them and I appreciate your time on my blog a lot.

Tubby craft products are available at following retailers-


Hope you liked the cards and will check out the wide range of good quality products by Tubby Craft. 

 Happy Crafting & Hugs 
 Bharati

Comments

Popular posts from this blog

Tubby Craft - Penguin Love - Birthday Cards by Deepti

Hello Everyone, I'm stopping by to share two birthday cards using cute Tubby Craft stamp called "Penguin Love" and "Birthday Wishes". I have used Masking technique to make both the cards. Card 1 To make this card, I die cut out the white card stock and stamped the penguins by masking them using Black tubby craft ink. Once satisfied, I stamped the balloons too and colored all these images using alcohol markers. After that I stamped the sentiment on white strip and adhered the same using foam tape along with washi tape. Glued it on Pista green card stock. Finally added some clear sequins to complete it. Here is my second card using same stamp set.. For this card also, I die cut out white card stock . Then I stamped the image and masked it to ink the background. After that I stamped the balloons and the sentiment. Added stamped and fussy cut gift too.  Finally adhered it on matching note card and added some matching s...

ATC coins using mini stamps

Hello there, This is Priyadarshini here today, I have ATC coins here today using stamps from Tubby craft. I have used 3 different stamps to make these. They are easy and quick to make and absolute fun too. I have a common base here which is black cardstock and die cut small circle from white cardstock. I created different background for each using stencils and inks from Tubby craft.  What are Artist trading coins? They are miniature art created on 2.5"circle of heavy base cardstock.  ATC with stenciled background                      First, I stenciled the white cardstock using stencils and dye inks. Then added this to a black circle die cut.  Inks used are:  Turquoise ,  Olive green ,  Lavender violet I offset the stencil to get a a complete stenciled background. I stamped the images from  Lovely Owl  and  Butterfly Love  and coloured them with colour penci...

Flying slider card! DT Anirudh

  Hello crafty people! Hope your week is up to a good start... I've got a video tutorial for easy peasy interactive cards using the latest tubby release which includes the adorable Plane Flying stamp... It looks absolutely delightful and is super easy to make, click on the link below to watch the video tutorial, Flying Slider cards! Take a closer look at the projects... These are some closeup shots of the cards... I hope you will try creating these and I'm sure they will bring smiles to your face as well as your loved ones! Don't forget to use the code ANIRUDH5 to get a 5% off! Be safe, Be healthy and  Keep crafting... The Tubby Craft products used in making these cards are listed down under- PLANE FLYING STAMP SCALLOPED CLOUD STENCIL  INK PADS ACRYLIC BLOCK BLENDING BRUSH Visit  https://www.tubbycraft.com/  and check the exciting range of crafty stuff... Tubby Craft products are also sold by these e-retailers:- HNDMD Crafters Corner Nagashri Arts