
Blending and watercoloring using Tubby Craft Dye ink pads

Hello There! 

Welcome to my post. Today i have made 2 projects using one stamp set and the vibrant dye inks by Tubby Craft.

PROJECT 1 : Tag

Picture1

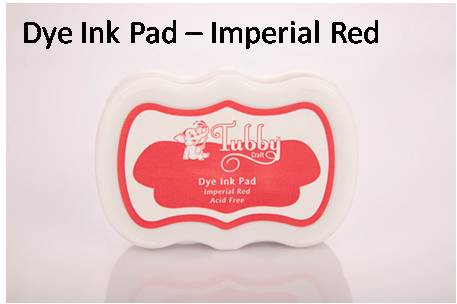
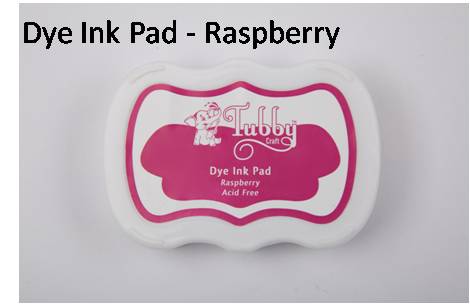
To make this card i first masked the edges of the Tag and then ink blended on it using the Tubby Craft inks - Light Pink, Rasberry and Imperial Red. Like i said in my earlier posts, a tip for a good ink blending is nice juicy ink dabbers. Mine are so full of ink. Also dabbing the ink on a separate paper and starting slightly off the page eliminates blobs of ink on the project. I must say i love how the Tubby craft inks blend into each other forming a smooth gradient. I peeled the masking tape off after the ink bending was over.

Picture2

On a separate watercolor paper, i stamped the image of the roses from "Roses and More" acrylic blocks by Tubby Craft and heat embossed it with in white embossing powder. I then colored the image using Gansai Tambi water colors. I fussy cut the image and adhere it to the inked tag.

Picture3.jpg

I then stamped the sentiment from the "Lucky to know you" set using the acrylic blocks by Tubby Craft and heat embossed it with in white embossing powder. I just love the font on this stamp set. It really adds a lot of interest to the project and an artsy look.

Picture4

I then took a white ribbon and inked it up using the Tubby Craft inks - Lawn Green, Emerald Green and a bit of Yellow. I punched a whole in the tag and threaded the inked ribbon through it.
To finish I added a few clear drops here and there on the tag.

Picture5.jpg 

Tubby Craft Supplies Used: 

Tubby Craft’s acrylic block with guidelines – for comfort stamping and excellent gripping
big acrylic block small 


lucky quote tubby roses stamp 
ink Lawn Greenink Emerald Green.jpgink Lemon-Yellow ink Imperial-Redink Light-Pink ink Raspberry 

CARD 2 : CAS Card
Picture6

For this card on a watercolor paper, i I first stamped the image of the roses from "Roses and More" acrylic blocks by Tubby Craft in Tubby Jet Black ink and heat embossed it with in clear embossing powder. I then colored the image using Tubby Craft Dye inks as water colors. The inks i used are : Imperial Red, Tangy Orange, Lemon Yellow, Light Pink, Lawn Green and Emerald Green. I fussy cut the image.

Picture7.jpg

Then i took a craft front which had the woodgrain pattern embossed on it and added strips of silver and black washi tapes. I adhered the colored image with foam tape and stamped the sentiment.

Picture8.jpg  

The "Warm wishes" sentiment is from the "Penguin Love" stamp set. I then added few nuvo drops and the clean & simple card is ready.

Picture9

Tubby Craft Supplies Used: 


Tubby Craft’s acrylic block with guidelines – for comfort stamping and excellent gripping

big acrylic block small 

ink Jet-Black ink Tangy-Orange ink Light-Pink ink Lemon-Yellow ink Lawn Green ink Emerald Green ink Imperial-Red
I hope you liked my cards. Do let me know how you like these cards by leaving me comments. I love to read them and I appreciate your time on my blog a lot.
Tubby craft products are available at following retailers- HNDMD CraftsNeed Letz Craft Crafters Corner Nirmal Stationers The Craft Shop Nagashri Arts Hope you liked the cards and will check out the wide range of good quality products by Tubby Craft. Happy Crafting & Hugs Bharati

Comments

Popular posts from this blog

ATC coins using mini stamps

Hello there, This is Priyadarshini here today, I have ATC coins here today using stamps from Tubby craft. I have used 3 different stamps to make these. They are easy and quick to make and absolute fun too. I have a common base here which is black cardstock and die cut small circle from white cardstock. I created different background for each using stencils and inks from Tubby craft.  What are Artist trading coins? They are miniature art created on 2.5"circle of heavy base cardstock.  ATC with stenciled background                      First, I stenciled the white cardstock using stencils and dye inks. Then added this to a black circle die cut.  Inks used are:  Turquoise ,  Olive green ,  Lavender violet I offset the stencil to get a a complete stenciled background. I stamped the images from  Lovely Owl  and  Butterfly Love  and coloured them with colour penci...

Tubby Craft - Penguin Love - Birthday Cards by Deepti

Hello Everyone, I'm stopping by to share two birthday cards using cute Tubby Craft stamp called "Penguin Love" and "Birthday Wishes". I have used Masking technique to make both the cards. Card 1 To make this card, I die cut out the white card stock and stamped the penguins by masking them using Black tubby craft ink. Once satisfied, I stamped the balloons too and colored all these images using alcohol markers. After that I stamped the sentiment on white strip and adhered the same using foam tape along with washi tape. Glued it on Pista green card stock. Finally added some clear sequins to complete it. Here is my second card using same stamp set.. For this card also, I die cut out white card stock . Then I stamped the image and masked it to ink the background. After that I stamped the balloons and the sentiment. Added stamped and fussy cut gift too.  Finally adhered it on matching note card and added some matching s...

Two amazing anniversary cards by Anushree

Hi Everyone !! Hope you all are doing good and crafting too. I have two cards for today. I have highlighted  different techniques for each card. Onto my first card, I have tried showcasing repeated stamping in a border style . I have used Plumeria Florals stamp set and Jet Black dye ink from Tubby craft to stamp the border first. Next I chose Imperial Red and Lead gray dye inks from Tubby Craft to color my florals. Sentiment is a die cut on Gold card stock and the card is embellished in gold peals. For border,I have adhered Gold border die cut to enhance the card on a black cardstock. Now onto my second card, I am using Checkered Stencil for the background .I have used rainbow colors from Tubby Craft Dye ink collection to put them on paper using blending brushes. I masked the center with a circle die cut before applying inks to the card base. Once stenciled background is ready,I removed the mask and stamped sentiment from...